
Customer Portal: inviting customers to follow their own freights
Give a customer limited access to Meight to check their own freights and documents, without seeing the rest of your operation.
What you'll learn from this guide
- What a customer portal user is and how it differs from an internal user
- How to invite a customer portal user step by step
- What the customer sees when they sign in
- How the customer uses the portal to follow freights, download documents, and choose notifications
- How to change or remove a customer's access later
What is it used for
The Customer Portal is a portal for your customers. They can follow the status of their quotes and freights and access the key financial or transport documents that matter, such as confirmations, PODs, and invoices. A customer signs in with limited access and sees only what belongs to their company.
You would use it whenever a customer asks to follow their freights directly in the platform.
Customer portal users
A customer portal user is a person from one of your customers who signs in through the portal. You create them in the same place where you manage your internal users, but they're different from an internal user, because a customer portal user is linked to one specific customer and receives the Guest customer role. That role gives limited access for checking the customer's freights, notifications, and settings.
They can't see your other customers, your internal operation, or your administrative settings. The customer you select when you create the user is what decides which freights and data they can access.
How to invite a customer portal user
Open Users
Go to Settings → Access management → Users. The user list opens.
Start the invitation
Select Create new. The Invite user panel opens on the right.
Enter the name
Enter the name of the customer contact. This is the person who will sign in to the customer portal.
Enter the email
The invitation is sent to this address, and the customer contact uses it to set their own credentials.
Pick the customer
In the Customer name field, type a customer name, VAT number, or external id, then select the customer. Selecting a customer here is what turns the new user into a customer portal user.
Open the access settings
In the Access settings section, select + Add. The access settings form opens.
Choose the workspace
Select the Workspace visibility for the customer portal user. This controls which workspace data they can see.
Assign the role
Open the Role menu and select Guest customer. When a customer is selected in the Customer name field, Guest customer is the only role available, because a customer portal user always has limited access.
Save
Select Save. Meight sends the invitation and adds the customer portal user to the user list.
Make sure the correct customer is selected in the Customer name field before you select Save. The customer link decides which freights and data the customer portal user can access.
What happens after the invitation
The customer portal user appears in the user list with the Guest customer role and the selected workspace. The customer contact receives an email invitation, sets their own credentials, and can then sign in.
What the customer sees
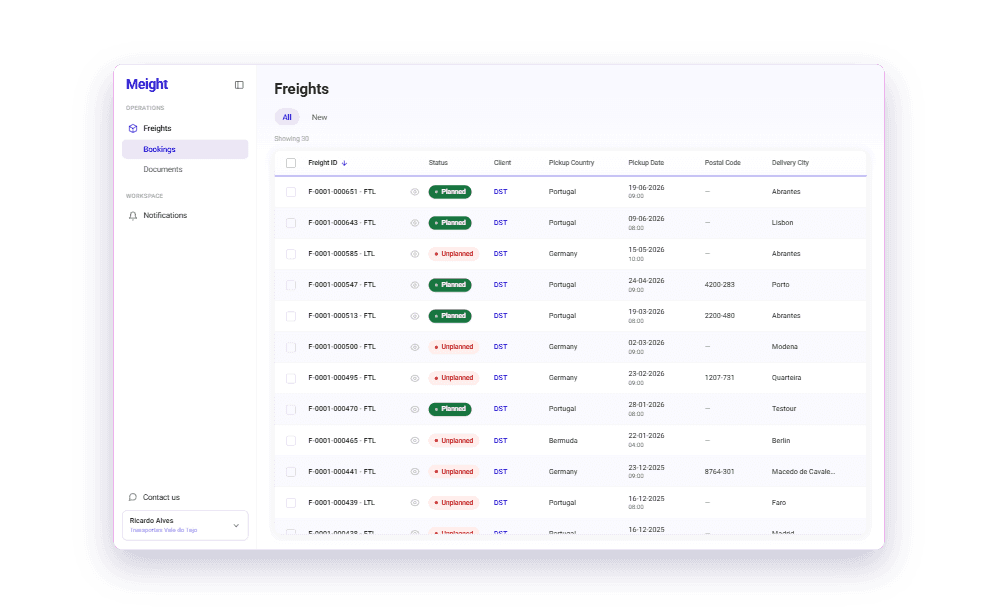
When the customer signs in, they see a list of their own freights, each with its status, pickup and delivery information, and dates.
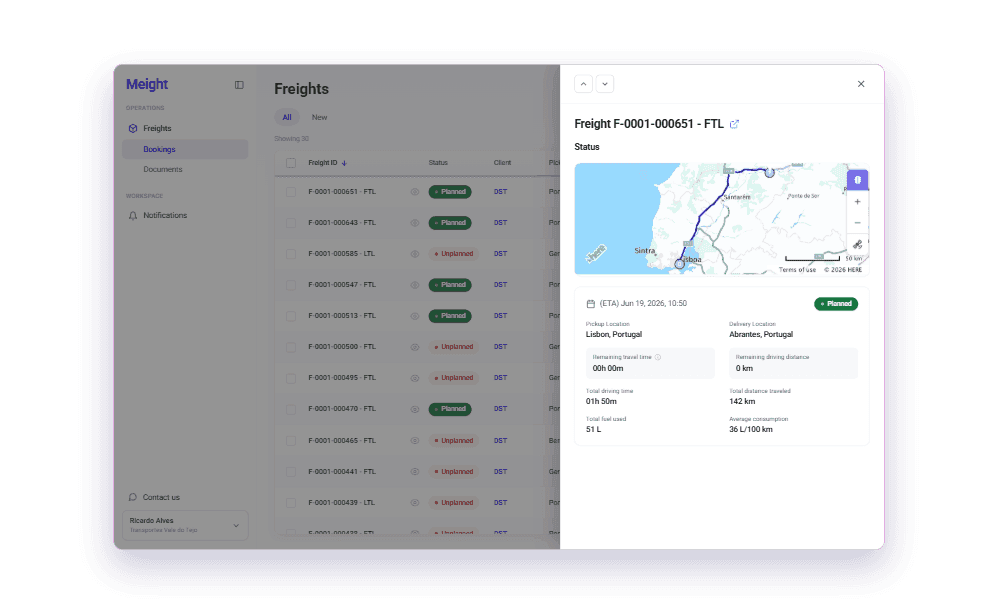
Opening a freight shows where it is on the map, along with the estimated time of arrival and the remaining travel time and distance.
How the customer uses the portal
- Sign in — The customer signs in to Meight with their own account, using the credentials they set when they accepted the invitation.
- Check the freights — The freights list shows their own freights, each with its status and the pickup and delivery information.
- Follow a freight — Opening a freight shows where it is on the map, with the estimated time of arrival and the remaining travel time and distance.
- Download documents — Inside a freight, the Freight documents tab holds the related transport documents, such as the CMR, the proof of delivery, and insurance, and each file can be viewed and downloaded. The Documents menu shows the same documents as a single list, already filtered to the customer's company.
- Choose notifications — The customer can be notified by email when the status of a freight changes, such as a task state change or a new estimated time of arrival, and controls which notifications they receive.
Change or remove access later
To change or remove a customer's access, open the customer portal user from the user list, then update the access settings or remove the user.
Why does this matter for your operation?
Customers follow their own freights directly in the platform. Each customer portal user stays limited to one customer's data, and you can change or remove the access from the user list at any time.